Fishing The Fly Scotland Forum

Mike Barrio

Hi folks :cool:

Here is a step by step for building the Barrio Lightweight Fly Rod, which Sandy "spiderman" put together last year :wink


First thing to check is that you have everything you need.
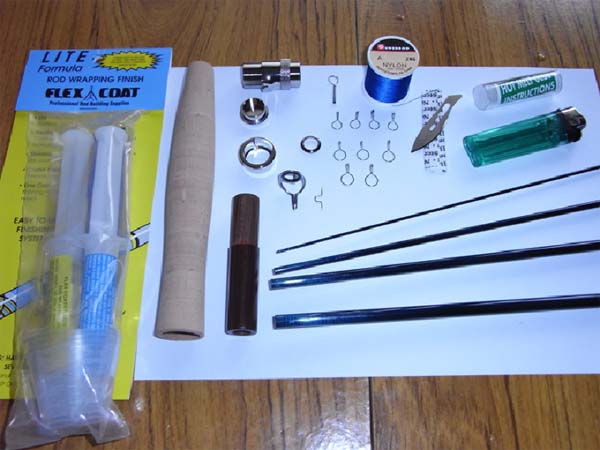


Scalpel blade, cigarette lighter, small file, spool of masking tape, Shoebox with two “V” cut at either end or a rod turner, Pack of araldite rapid 2 part epoxy and a pack of Flex-coat Litebuild (my recommendation)

The kit should contain, 1x blank, 1x cork grip ,1x reel seat with wood insert, 1x spool of thread, 1x stick of hot melt glue, 1 x tip ring, 1x butt ring, 1x keeper ring, 1 x winding check, 4 x size 2 rings, 3x size 3 rings, 2x size 4 rings.

So you’re ready to start ...... Rub down the blank with a dry,clean cloth.
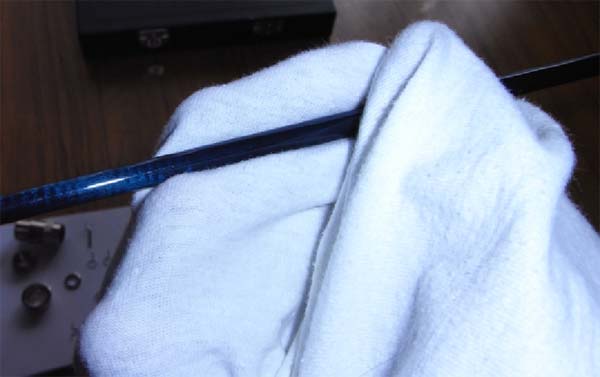


First put the rod sections together, all 4, and lay them on the floor next to a tape measure. Cut some small pieces of masking tape to wrap around the blank and put to the side. Using the ring spacing guide start at the tip and place a piece of tape around the blank at the measured distance.

Ring spacing guide.

Tip – 3½” – 8½” – 14½” – 21½” – 29½” – 38" – 47" – 57" – 67" – 77"      (measurements)
4.5     2         2          2           2           3        3       3        4       4       butt      (ring sizes)
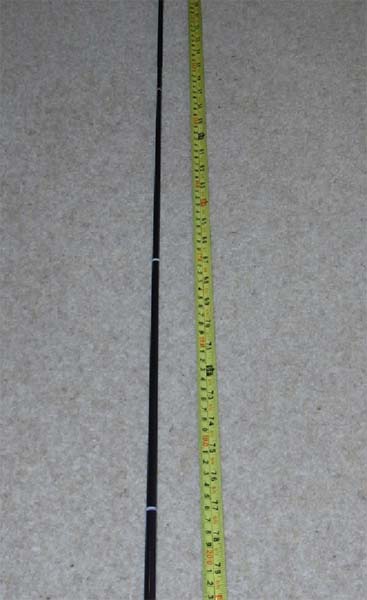


Once the tape is in the correct places take the rod apart.

Place each section vertical between the floor and your finger and push just enough to deflect the blank, remember which way the section flexes. Try this several times it should go the same way every time.
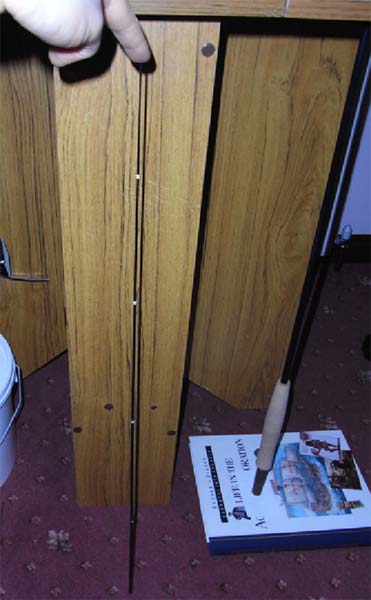
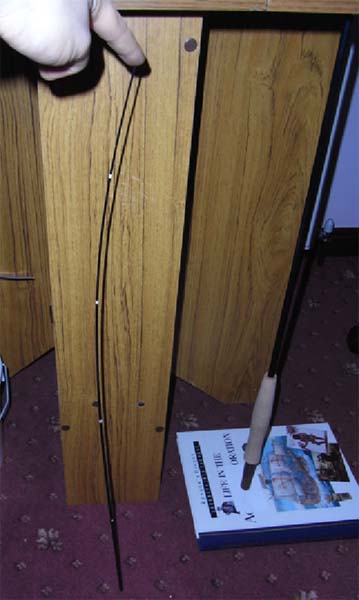


Mark the inside of the curve on one of the pieces of tape lay the piece down so you can see the mark and copy the mark onto the rest of the tape bands.
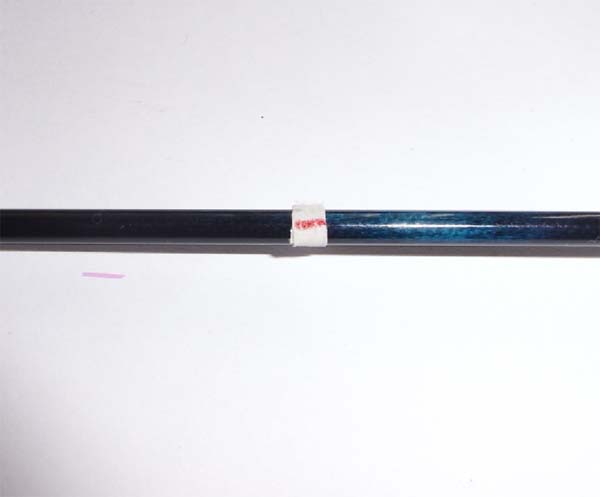


This means you are putting the rings on the inside of the spine (the best place for them, on this blank). You can repeat this for the top 2 sections, possibly the 3rd too, but it is much harder to bend. I wrap the bottom two sections along the straightest line, you can find this by holding the section up and looking along it then turn it in your fingers to find the straightest line then mark it on the tape.
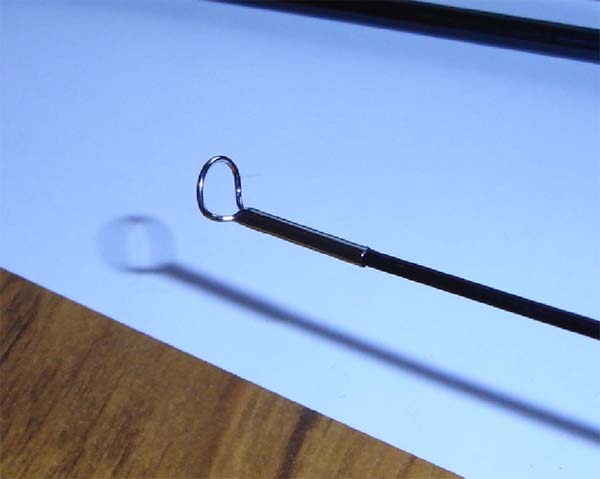


Now for the rings, dry fit the tip ring, if it is too tight then gently sand or shave the tip till the ring fits. Slice off a sliver of hot melt glue and insert into the tip ring.
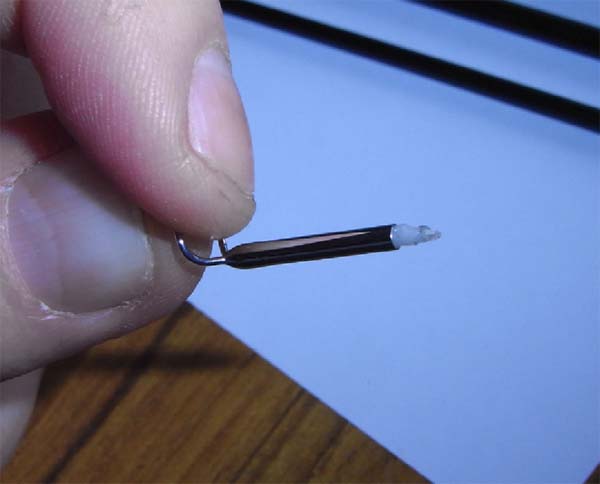


Heat the tip ring with the cigarette lighter, the glue will melt and you can push it onto the end of the blank, make sure the loop is on the side you marked (if its not quite perfect don’t worry you can heat it up again and reposition once the other rings are on)

Whip a small portion of thread and finish just behind the tube of the ring.
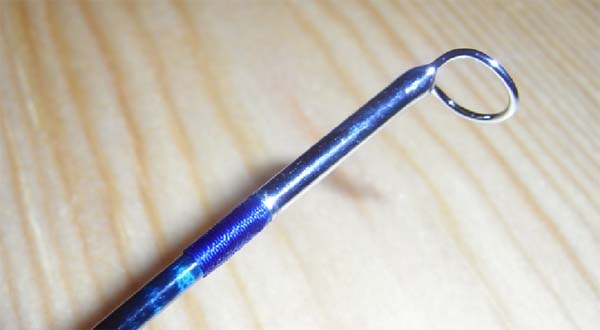


Take the next ring on the chart, a size 2. Before you start, all the ring feet should be filed carefully to a smooth tapered edge.
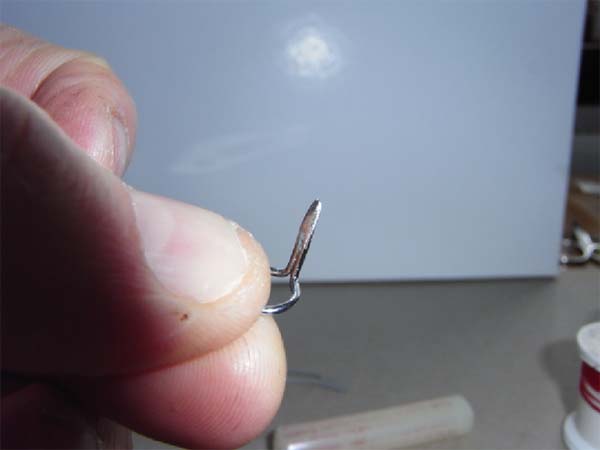


This helps the thread slide over them smoothly without catching the edges and fraying.

Heat the ring with the lighter.
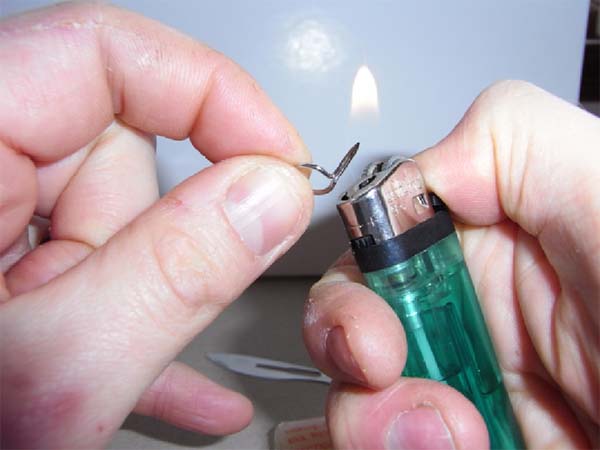


then wipe the ring foot on the end of the hot melt glue.
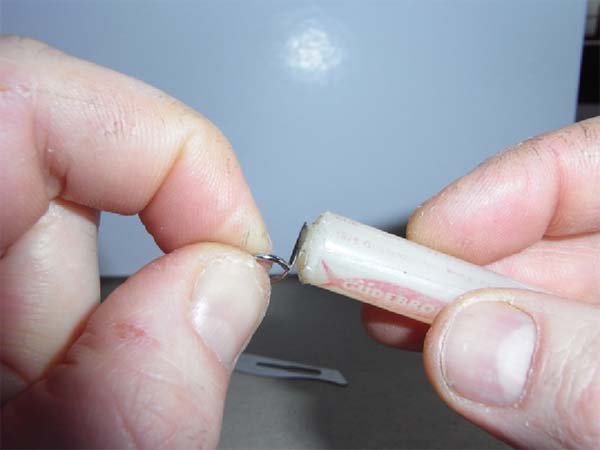


Quickly position it on the blank, in line with the marks you drew and the loop parallel with the tape. It should be in-line with the tip ring. If not, a quick heat and try again.
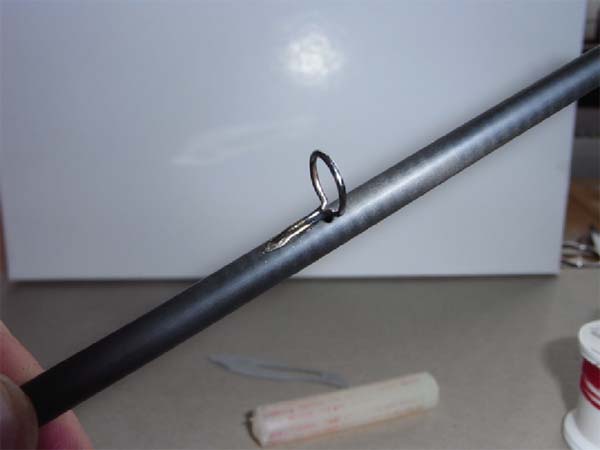


Start the whipping approx 5 thread widths before the start of the foot and continue up to the end of the flat portion, then finish.
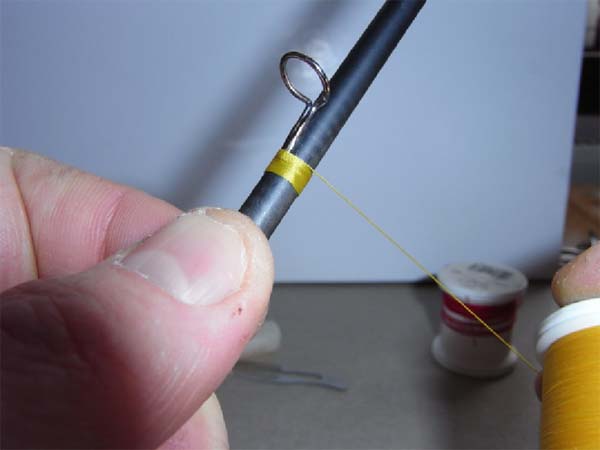
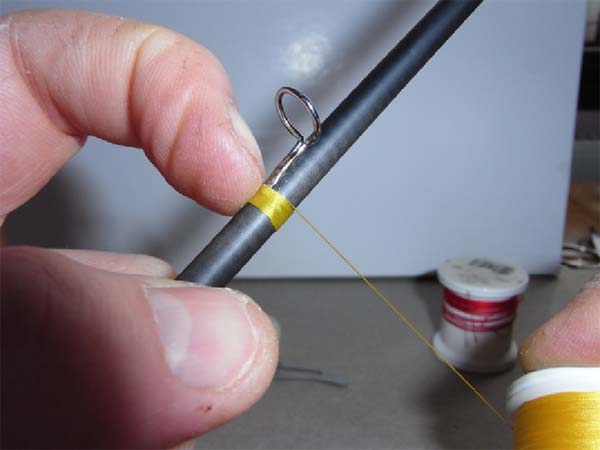
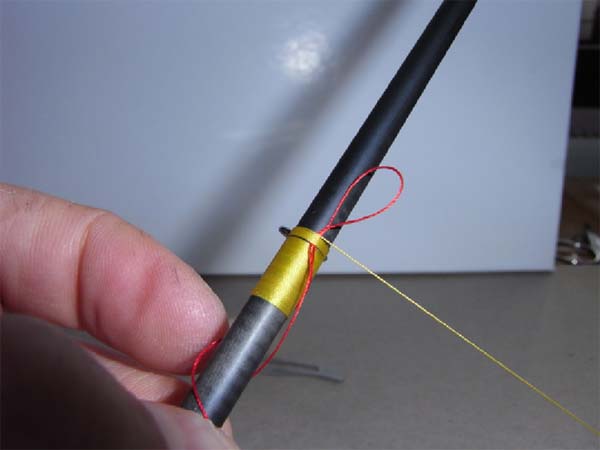
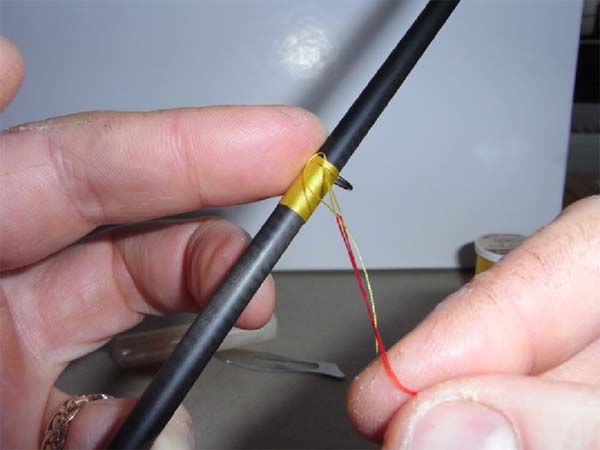
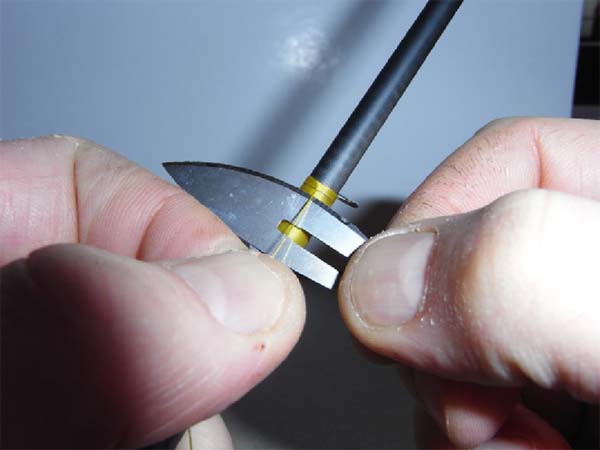
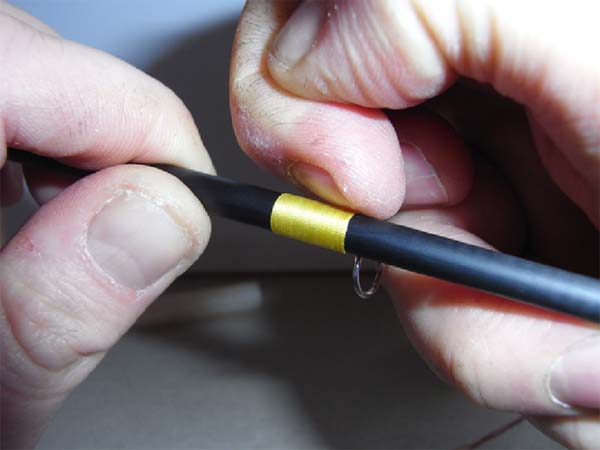
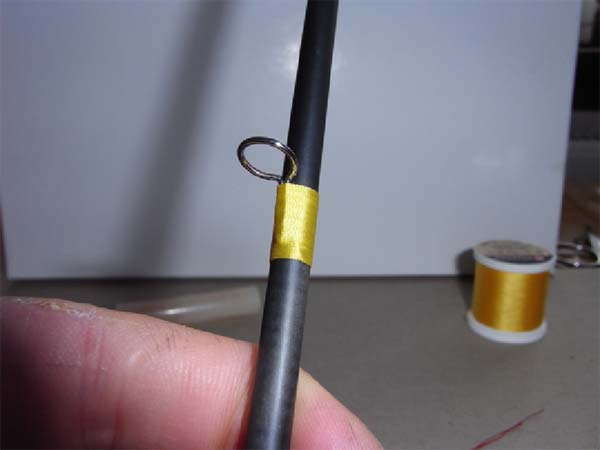


( For a more detailed description of the ring whipping process - See http://www.fishingthefly.co.uk/forum/index.php?topic=1623.0

Repeat this for the rest of the rings on the section. Then finally start a whipping at the very end of the butt section (about 1 mm from the very tip) whip a plain portion of about ½” and finish. Remove the pieces of tape.

Gently wave the cigarette lighter over the whippings to burn off any fuzz, carefully, if you stay too long over any point the thread will melt and the whipping unravel.
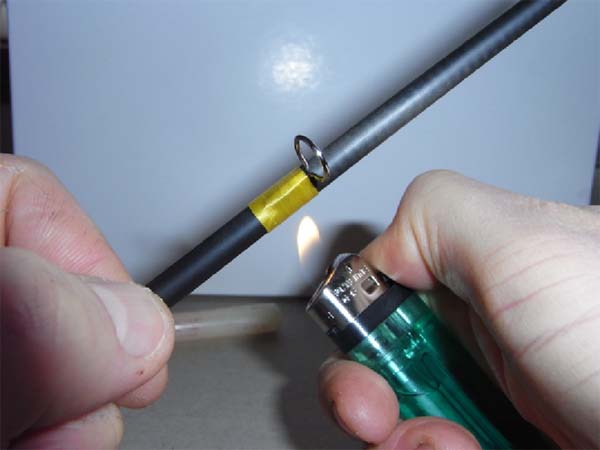


Repeat this for the other two sections, when you get to the butt ring, place the forward leg (single one) under the tape and use the tape to hold it in position while you whip the other leg, then remove the tape and whip the single leg.

Make sure all the rings are in line every time you fit one, it pays off in the end.

The butt section is different, dry fit all the reel seat and cork components and measure how much of the blank they cover
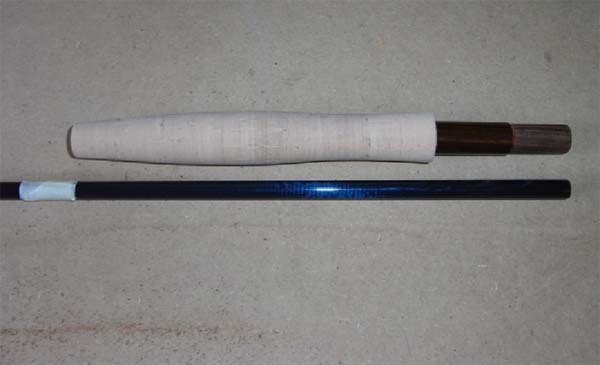


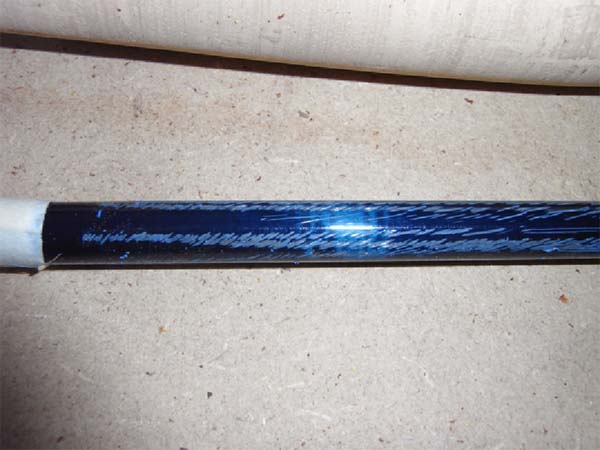
Remove the bits and then key the end of the blank with a file over the area they will sit.


Bore the cork with a rat-tail file to suit the taper of the butt section
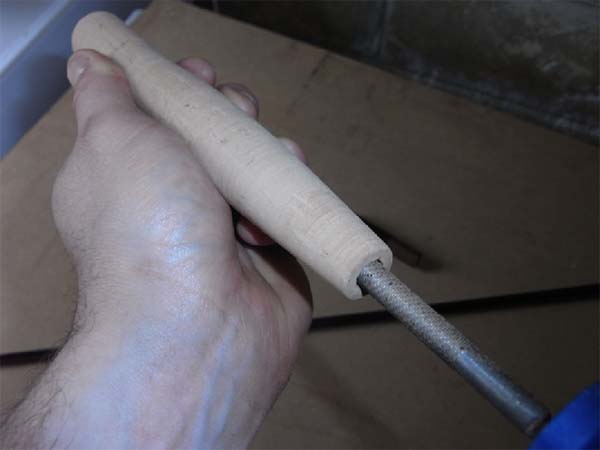


When you are dry fitting, do this carefully and take your time, breaking the cork is not the end of the world, but it makes life a bit more tricky.
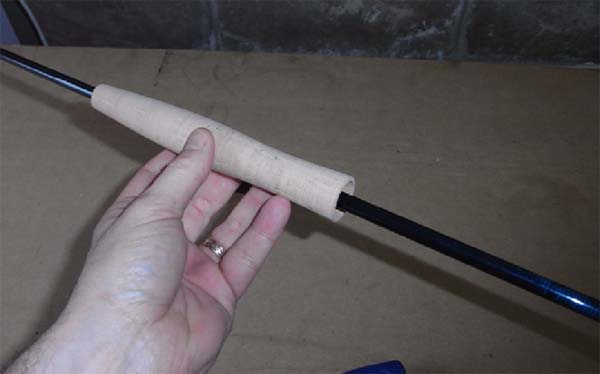


If you do break the cork then glue it together with some araldite, wipe of any excess and leave to dry fully before trying to fit the handle, once the handle is complete, sanding the glued area with some 200 grade sandpaper will remove any excess glue (shiny bits) and leave the cork looking as good as new . Once the bore of the handle is satisfactory put the cork to one side.
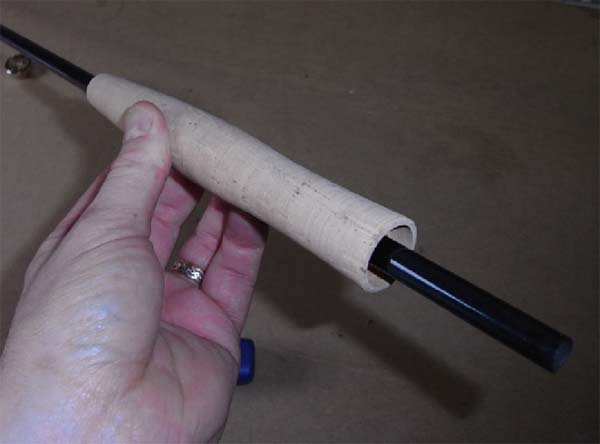


If the insert is too narrow file this too, till it fits nice and snug
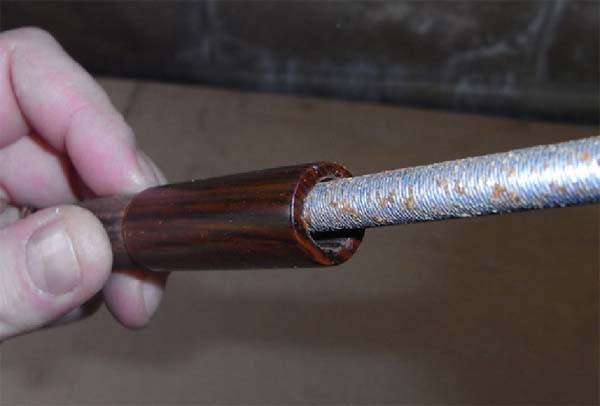


Mix up some Araldite epoxy, a small amount will do for now and cover the end section where the reel seat will sit.
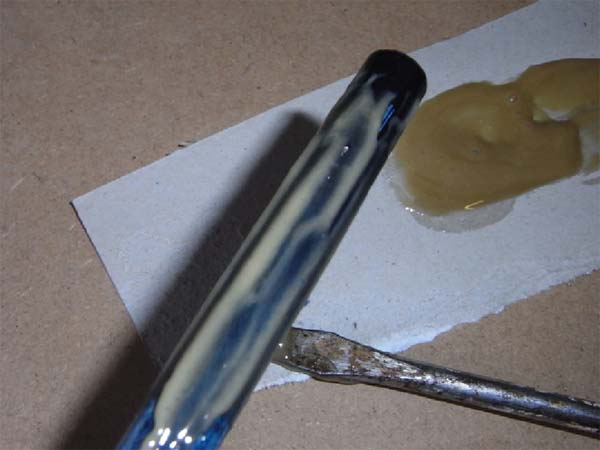


Slide the wood insert down and position over the epoxy
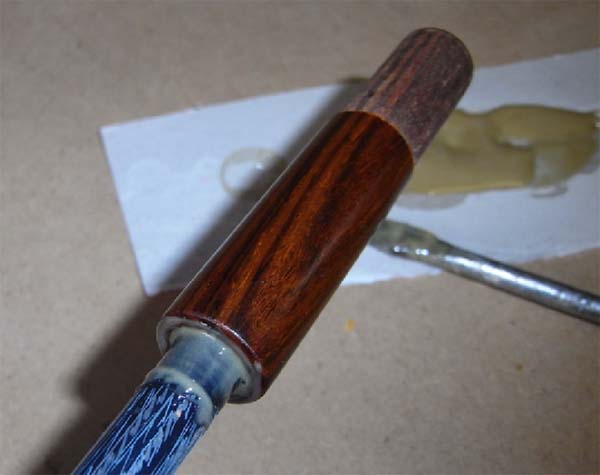


Align the end of the insert with the end of the blank, this gives you plenty room for the butt cap.
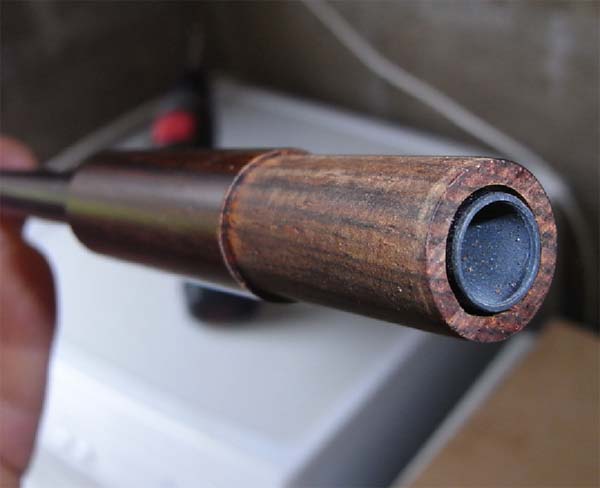


Glue the reel foot guide component into the recess in the cork
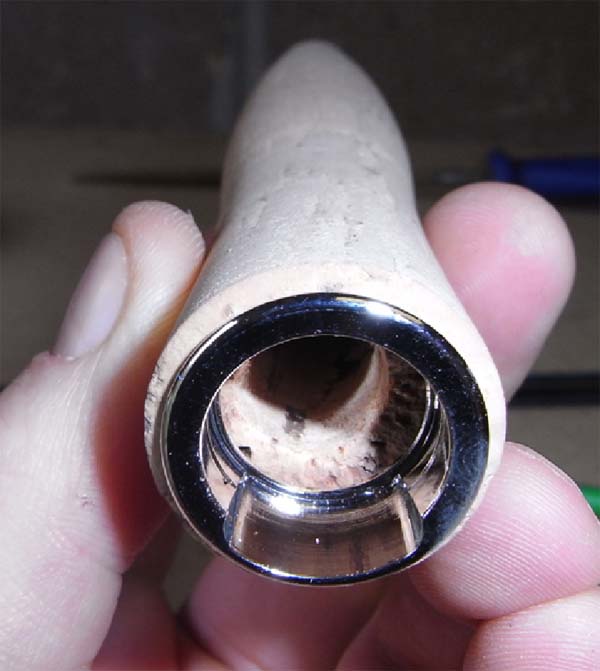


Leave to dry (about ½ an hour), Try to fit it so the best bit of cork will sit under your thumb on the top of the grip.
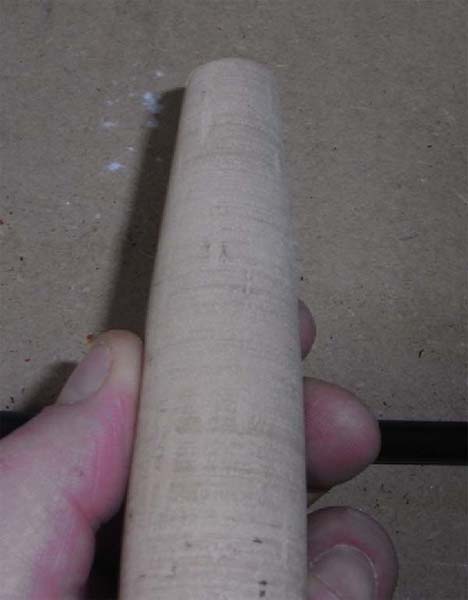


Mix up some more Araldite and cover the section the cork will cover
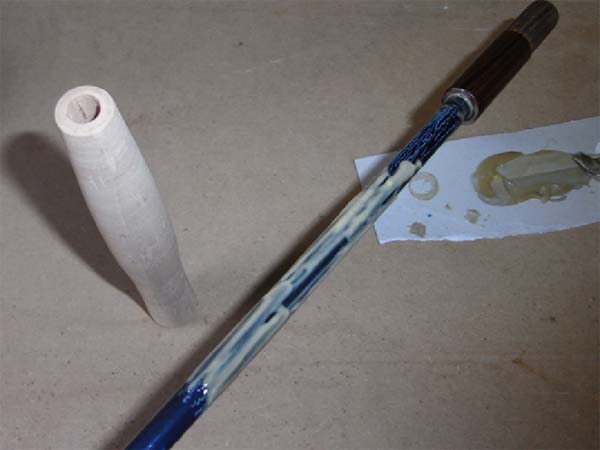


Slide the cork grip down over the glue. Give a small pull back up and then down to disperse the glue better, then line it up on the reel seat and push till the wood is resting against the metal of the reel foot fixed fitting.
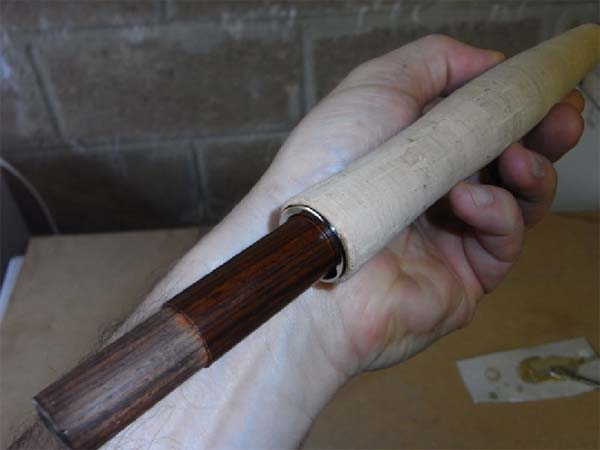


There should be some glue squeezed out of the tip of the cork grip
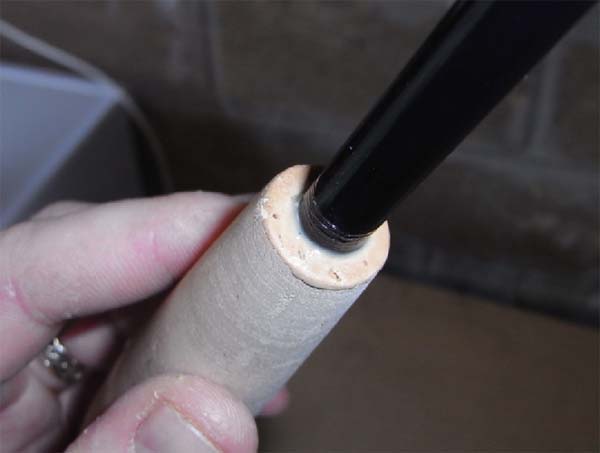


Wipe off any excess.


Leave to dry for at least a couple of hours this time.

Then with a little more araldite, attach the metal work to the insert, make sure you have the pocket on the right way up, and fit the butt cap. Hold in position until set.
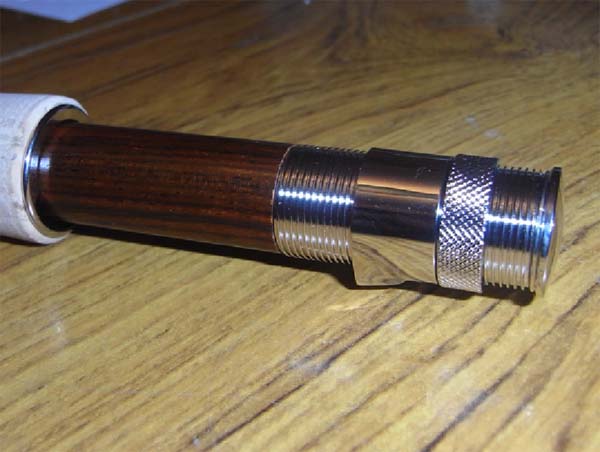


Apply a little glue and fit winding check, leave to dry.
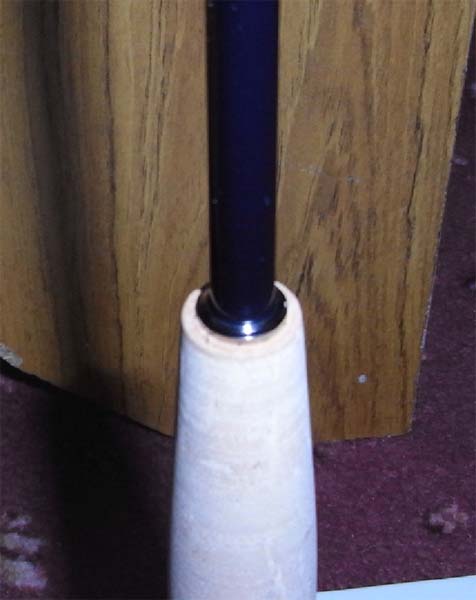


Place the hook keeper ring just forward of the grip on what will be the lower side (same as the pocket for the reel foot) hold in position with a piece of tape
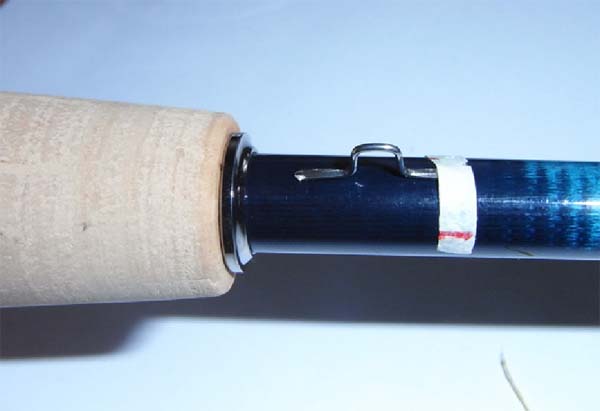


Whip between the winding check and onto the keepers foot. Remove the tape and whip the other foot.
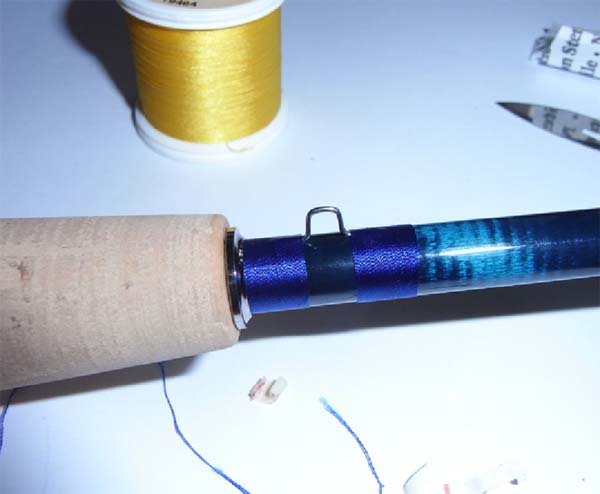


Fuzz burn again and the rod is finished and ready for the whippings to be finished. If you want to autograph the rod then use Humbrol enamel and a fine brush or fountain pen nib and sign the section just ahead of the keeper ring. Enamel paint will not react with the whipping finish so pick a suitable colour (silver looks nice on the blue blank)

1 pack of Litebuild will build one rod, follow the mixing directions on the pack. The pack also has information about making the “V” box for turning the rod, if you do it this way cut the notches in the box and make sure you can put the rod in with plenty clearance for the whippings from the edges of the box. Put the radiator on to get the room to a nice warm temperature, it helps the finish to dry and encourages the air bubbles to pop.

Apply a thin coat of finish to the whippings, just enough to cover the threads, go over the edges by about ½ mm only
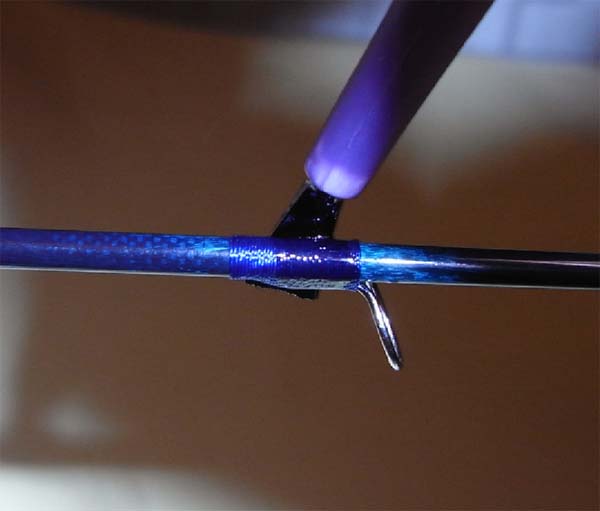


Don’t worry if you can see the thread weave, at this stage it means you have done it right. Gently blow on the finish to remove any air bubbles (be careful not to blow spit on them)
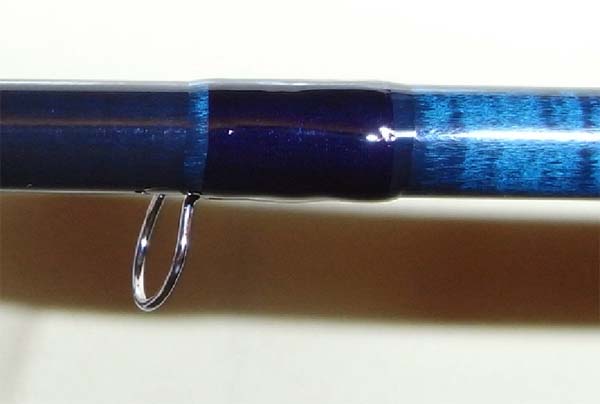


Turn the rod 90 degrees every 5 mins for the first hour then every 15mins for the next 2 hours, then every hour as necessary (it shouldn’t be.) The first coat will take about 8-10 hours to cure (give it about 24hrs and the finish will be super). If there are any hairs sticking out or rough fuzzy bits then slice them off with the scalpel blade (do NOT use sandpaper)

Apply the second coat just the same as before, except extend about 1mm beyond the whippings and put on enough finish to make a nice smooth cigar shaped whipping (not a rugby ball!)
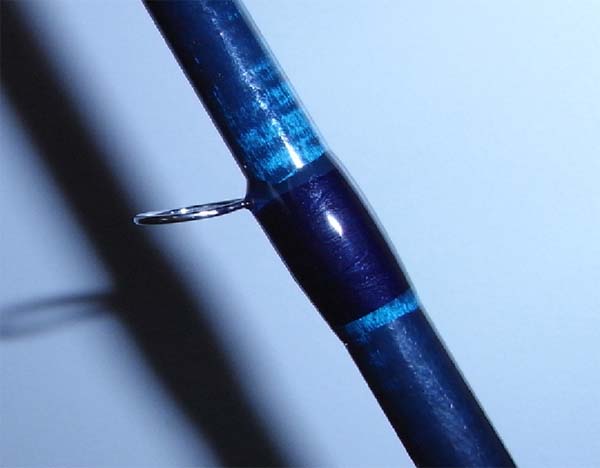


It should be enough so you cannot see the thread weave (ideally) however if when it is dry the edges of the thread seem to be showing its fine (if you must, then slice off any fuzzy bits and recoat)
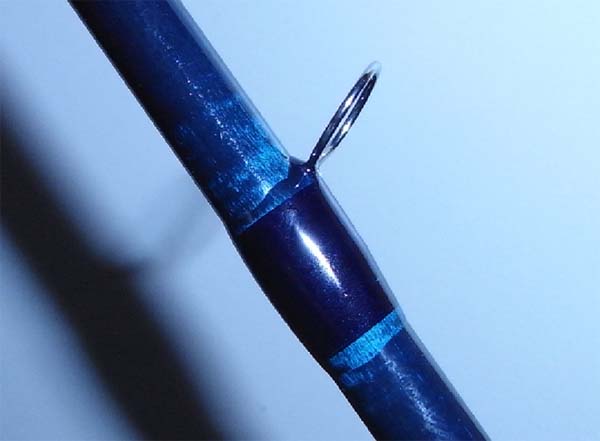


Leave aside for a couple of days to harden before playing (its worth it) and then do the next 2 sections in the same way. I tend to do the sections in pairs it allows good use of the epoxy you have mixed up and is not too much in one go to control for turning (it goes off while you are applying it, so can get a bit thick if you try to do all four sections at once)

Once the rod has sat for a couple of days to harden, give it a wipe with a baby wipe to remove any residue that may remain, dry it off and it is ready to use ............. Enjoy! :wink

Matt Henderson

excellent work there Mike/Sandy.  Can't wait to get my hands on my own one soon!

Iain Goolager

cracking SBS, tip top!

One day I'll need it for reference.

Some serious dedication to the cause Sandy, I struggle to do an SBS when tying a fly

Iain


Jay Scott


That'll be the January SBS winner  :z16 looks great Mike! still thinkin about getting a 3 weight kit   :cool:

Jay

Mike Barrio

That'll be the January SBS winner  :z16

Jay

Oh no it won't .............. it isn't a fly and he didn't do the step by step in January :z4

Cheers
Mike

Bronzebommer

Nice one Mike, very topical :wink

Matt

Sandy Nelson

About bloody time too :z4 :z4
Did that back in April. Cheers Mr B

Hopefully it will help anyone who wants to build their own rod. Its well worth it. Very easy, if you can tie flies you can build a rod, its less complex :z16
You can end up with a fantastic rod for half the cost of a factory one.
So you get a Sage for the price of Greys and so on.

I think everyone should roll their own, then the world would be full of lovely unique products, very COOL  :z12

Sandy

Bronzebommer

I cant see me buying another factory built rod again. :z12

Matt

stickleback

Nice one Sandy - good to see how an 'old pro' does it  :z16

Iain Goolager

Quote
Place the hook keeper ring just forward of the grip on what will be the lower side (same as the pocket for the reel foot) hold in position with a piece of tape


Nooooooooooooooooooooooooo! Argh!


 :z4 :z7 :z4 :z7 :z4 :z7 :wink

Sandy Nelson

 :z4 :z4 :z4 :z4 :z4

Yeah but see how easy it is to remove :wink

 :z18

Conehead

Excellent Sandy

You have got me wanting to do one myself. Can you reccommend a 9ft 5# 4pce kit for me to have a go at. :z16

Cheers Geoff

Matt Henderson

What should you do if the reel seat isn't snug on the blank? Did I see somewhere people building up the blank with masking tape?

thanks

matt

stickleback

What should you do if the reel seat isn't snug on the blank? Did I see somewhere people building up the blank with masking tape?

thanks

matt

Yes, that's right, you make 'bushings' with the maksing tape until the real sit just slips over them and no more (during the dry fit).  Then when your ready to assemble really slather on the epoxy glue.  Here's a photo of my #5 - the bushings were only a few layers of tape thick but really made a difference.


Cammy

Matt Henderson

Thanks for that.  I went back and looked through the books I borrowed from Mike and they suggested doing that too.  I've just got the threaded part, the end cap and the winding check to put on tonight and I'll be able to do the keeper ring tomorrow night and then start on the rod rings! Quite enjoying it so far...

David Norwich

Hi folks :cool:

Here is a step by step for building the Barrio Lightweight Fly Rod, which Sandy "spiderman" put together last year :wink


First thing to check is that you have everything you need.


Scalpel blade, cigarette lighter, small file, spool of masking tape, Shoebox with two “V” cut at either end or a rod turner, Pack of araldite rapid 2 part epoxy and a pack of Flex-coat Litebuild (my recommendation)

The kit should contain, 1x blank, 1x cork grip ,1x reel seat with wood insert, 1x spool of thread, 1x stick of hot melt glue, 1 x tip ring, 1x butt ring, 1x keeper ring, 1 x winding check, 4 x size 2 rings, 3x size 3 rings, 2x size 4 rings.

So you’re ready to start ...... Rub down the blank with a dry,clean cloth.


First put the rod sections together, all 4, and lay them on the floor next to a tape measure. Cut some small pieces of masking tape to wrap around the blank and put to the side. Using the ring spacing guide start at the tip and place a piece of tape around the blank at the measured distance.

Ring spacing guide.

Tip – 3½” – 8½” – 14½” – 21½” – 29½” – 38" – 47" – 57" – 67" – 77"      (measurements)
4.5     2         2          2           2           3        3       3        4       4       butt      (ring sizes)


Once the tape is in the correct places take the rod apart.

Place each section vertical between the floor and your finger and push just enough to deflect the blank, remember which way the section flexes. Try this several times it should go the same way every time.


Mark the inside of the curve on one of the pieces of tape lay the piece down so you can see the mark and copy the mark onto the rest of the tape bands.


This means you are putting the rings on the inside of the spine (the best place for them, on this blank). You can repeat this for the top 2 sections, possibly the 3rd too, but it is much harder to bend. I wrap the bottom two sections along the straightest line, you can find this by holding the section up and looking along it then turn it in your fingers to find the straightest line then mark it on the tape.


Now for the rings, dry fit the tip ring, if it is too tight then gently sand or shave the tip till the ring fits. Slice off a sliver of hot melt glue and insert into the tip ring.


Heat the tip ring with the cigarette lighter, the glue will melt and you can push it onto the end of the blank, make sure the loop is on the side you marked (if its not quite perfect don’t worry you can heat it up again and reposition once the other rings are on)

Whip a small portion of thread and finish just behind the tube of the ring.


Take the next ring on the chart, a size 2. Before you start, all the ring feet should be filed carefully to a smooth tapered edge.


This helps the thread slide over them smoothly without catching the edges and fraying.

Heat the ring with the lighter.


then wipe the ring foot on the end of the hot melt glue.


Quickly position it on the blank, in line with the marks you drew and the loop parallel with the tape. It should be in-line with the tip ring. If not, a quick heat and try again.


Start the whipping approx 5 thread widths before the start of the foot and continue up to the end of the flat portion, then finish.


( For a more detailed description of the ring whipping process - See http://www.fishingthefly.co.uk/forum/index.php?topic=1623.0

Repeat this for the rest of the rings on the section. Then finally start a whipping at the very end of the butt section (about 1 mm from the very tip) whip a plain portion of about ½” and finish. Remove the pieces of tape.

Gently wave the cigarette lighter over the whippings to burn off any fuzz, carefully, if you stay too long over any point the thread will melt and the whipping unravel.


Repeat this for the other two sections, when you get to the butt ring, place the forward leg (single one) under the tape and use the tape to hold it in position while you whip the other leg, then remove the tape and whip the single leg.

Make sure all the rings are in line every time you fit one, it pays off in the end.

The butt section is different, dry fit all the reel seat and cork components and measure how much of the blank they cover


Remove the bits and then key the end of the blank with a file over the area they will sit.


Bore the cork with a rat-tail file to suit the taper of the butt section


When you are dry fitting, do this carefully and take your time, breaking the cork is not the end of the world, but it makes life a bit more tricky.


If you do break the cork then glue it together with some araldite, wipe of any excess and leave to dry fully before trying to fit the handle, once the handle is complete, sanding the glued area with some 200 grade sandpaper will remove any excess glue (shiny bits) and leave the cork looking as good as new . Once the bore of the handle is satisfactory put the cork to one side.


If the insert is too narrow file this too, till it fits nice and snug


Mix up some Araldite epoxy, a small amount will do for now and cover the end section where the reel seat will sit.


Slide the wood insert down and position over the epoxy


Align the end of the insert with the end of the blank, this gives you plenty room for the butt cap.


Glue the reel foot guide component into the recess in the cork


Leave to dry (about ½ an hour), Try to fit it so the best bit of cork will sit under your thumb on the top of the grip.


Mix up some more Araldite and cover the section the cork will cover


Slide the cork grip down over the glue. Give a small pull back up and then down to disperse the glue better, then line it up on the reel seat and push till the wood is resting against the metal of the reel foot fixed fitting.


There should be some glue squeezed out of the tip of the cork grip


Wipe off any excess.


Leave to dry for at least a couple of hours this time.

Then with a little more araldite, attach the metal work to the insert, make sure you have the pocket on the right way up, and fit the butt cap. Hold in position until set.


Apply a little glue and fit winding check, leave to dry.


Place the hook keeper ring just forward of the grip on what will be the lower side (same as the pocket for the reel foot) hold in position with a piece of tape


Whip between the winding check and onto the keepers foot. Remove the tape and whip the other foot.


Fuzz burn again and the rod is finished and ready for the whippings to be finished. If you want to autograph the rod then use Humbrol enamel and a fine brush or fountain pen nib and sign the section just ahead of the keeper ring. Enamel paint will not react with the whipping finish so pick a suitable colour (silver looks nice on the blue blank)

1 pack of Litebuild will build one rod, follow the mixing directions on the pack. The pack also has information about making the “V” box for turning the rod, if you do it this way cut the notches in the box and make sure you can put the rod in with plenty clearance for the whippings from the edges of the box. Put the radiator on to get the room to a nice warm temperature, it helps the finish to dry and encourages the air bubbles to pop.

Apply a thin coat of finish to the whippings, just enough to cover the threads, go over the edges by about ½ mm only


Don’t worry if you can see the thread weave, at this stage it means you have done it right. Gently blow on the finish to remove any air bubbles (be careful not to blow spit on them)


Turn the rod 90 degrees every 5 mins for the first hour then every 15mins for the next 2 hours, then every hour as necessary (it shouldn’t be.) The first coat will take about 8-10 hours to cure (give it about 24hrs and the finish will be super). If there are any hairs sticking out or rough fuzzy bits then slice them off with the scalpel blade (do NOT use sandpaper)

Apply the second coat just the same as before, except extend about 1mm beyond the whippings and put on enough finish to make a nice smooth cigar shaped whipping (not a rugby ball!)


It should be enough so you cannot see the thread weave (ideally) however if when it is dry the edges of the thread seem to be showing its fine (if you must, then slice off any fuzzy bits and recoat)


Leave aside for a couple of days to harden before playing (its worth it) and then do the next 2 sections in the same way. I tend to do the sections in pairs it allows good use of the epoxy you have mixed up and is not too much in one go to control for turning (it goes off while you are applying it, so can get a bit thick if you try to do all four sections at once)

Once the rod has sat for a couple of days to harden, give it a wipe with a baby wipe to remove any residue that may remain, dry it off and it is ready to use ............. Enjoy! :wink


Outstanding pictures Mike and Sandy. What more do you need on showing  how to assemble a fly rod?  Excellent.  :grin

The only comment I would make to improve on the build sequence, is to fit the reel seat last. Then line that up with the guides. It makes the job so much easier when whipping on the guides.  It is easier to just line up the seat rather than the do it the other way about.

Once you have the guides located on the blank were you want them, there is no real need to have the seat fitted till the whole lot of the guides have been fitted and the wraps coated.

Regards,

David.

www.davidnorwich.com

Sandy Nelson

Thank you :z18

the rod we were doing was 4 piece, so lining up the seat after was not a issue
however I can see what you mean for doing a 3 or2 piece rod where there may be
a ring on the butt section. My only comment would be in this case , that I like to align the cork as well
so that you get the best bit on top and I would have to fit the cork first before the rings. Same as in the sequence.
So i would mark the rod with it's alignment for the perferred plane of bending and fit insert and cork as before.
Then fit the rings. I would be doing it this way so I get the cork where I want it, if the cork was perfect then it wouldn't matter but I've yet to come across some anywhere near it :z10
these are the beauties of building your own things :z16

cheers

sandy   

troutist

Nice build Mike!

Simon

This is brilliant. I feel a winter project coming on.  :cool:

Stewart Yates

Superb Mike, really looking forward to building my first rod sometime soon.
I am hoping to ultimately have a selection of three rods - small stream, #6 multi-purpose, #9 saltwater - all made to the highest spec and also all fitting in carry-on luggage, so  sections of 52cm tops.
Any advice any forum users could give would be very much appreciated!

Travis Jones

This is a great guide. Thanks for sharing, Mike!  :z18

Alexander Finlay

Many thanks for having this up.

Having filled my fly boxes I was looking for something to do during lockdown and so got myself a 6’6” cane rod kit. These instructions were a great help! 

I had it out for the first time last week on a small Yorkshire beck.  Great fun to use and I was was rewarded with three of these  :z4


Sandy Nelson

That’s great stuff Alexander

Nothing quite beats catching fish on your own rod with your own flies :z16

Sandy

Phil Slessor

Hi team,
Will be following these
Have just got a epic 580 fast glass #5
But section on and looks ok (not sure if it will be up to Sandy’s standard)
Have also wrapped my first guide 12mm thinks the biggest would be easy ( wrong )
Did 1 leg in black and the other white ( it is harder than I thought)


Mike Barrio

Great stuff Phil  >)

I inserted the photo for you  :z16
Just go to a photo in the gallery and open it ..... and you will find an 'Image Linking Code' to copy and paste in your post  *smiley-wink*
More on adding photos to posts here: https://www.fishingthefly.co.uk/forum/index.php?topic=5254.0

Cheers
Mike


Barrio Fly Lines - designed in Scotland - Cast with confidence all over the world

Barrio Fly Lines

Designed in Scotland

Manufactured in the UK

Cast with confidence all over the world

www.flylineshop.com